To entertain myself, to learn some IoT and dive deeper into cloud technologies, I started a new pet project. This post explains how to monitor the temperature and humidity of a room through Google Cloud.
The solution consists of the following elements.
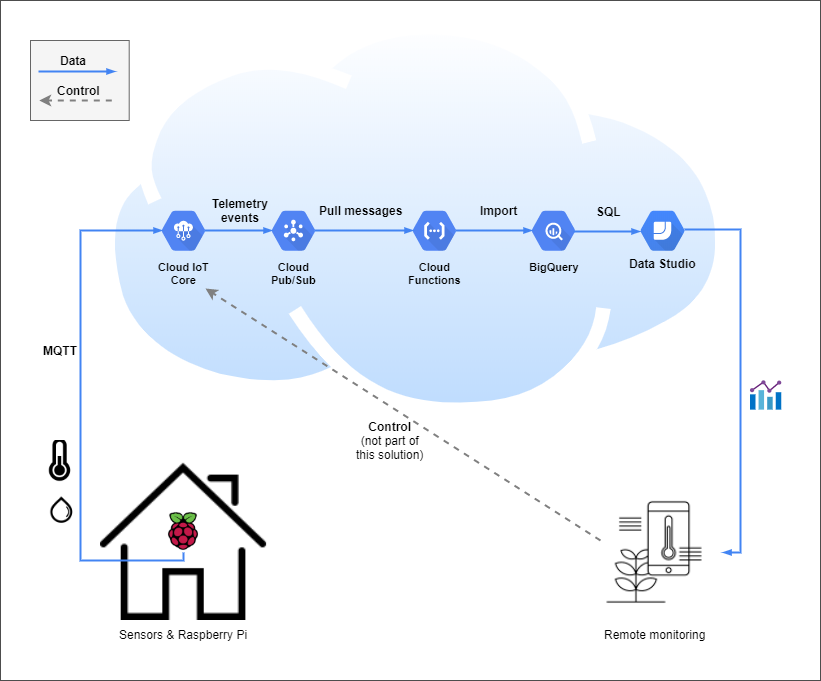
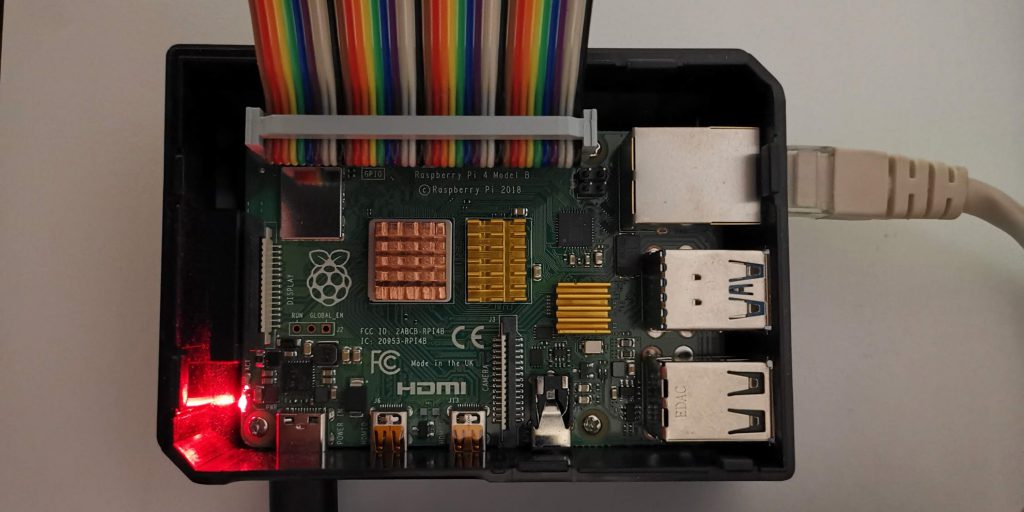
I ordered a couple of sensors (temperature, humidity, gas, sun light, etc.) in the recent past, that will installed in my backyard. I’ve a Raspberry Pi, that is currently used as a media center, so I decided to use it as the processing unit in the house.
Although I don’t want to move the Pi to the outside (for that I’m expecting an ESP32 to arrive), I still wanted to make some progress while waiting for the delivery, so I decided to start small and connect the temperature/humidity sensor to the Raspberry directly and prototype the cloud IoT connection with this setup.
My most recent focus and interest is Google Cloud Platform (GCP), so I’ll use GCP’s IoT and data processing/analysis capabilities to build the monitoring part in the cloud.
The programming language we use in this post is Python. My Python version is 3.7 (the same as the version of the GCP Cloud functions runtime at the time of writing this post).
In addition to the components displayed above, we will use the GCP Cloud Scheduler to keep the cloud function invocations under control, and we use StackDriver for log analysis.
Why should you read this post?
There are plenty of tutorials covering sensors + Raspberry Pi, or GCP IoT setup. However in this post I cover the entire setup end-to-end and show you how you can fit within the free usage limits and operate this solution with no cloud costs even after your 12-month GCP trial. We will also discuss a few options for BigQuery data ingestion.
The hardware parts
I used the following main parts:
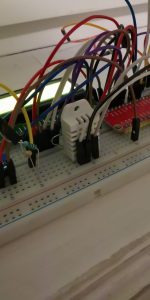
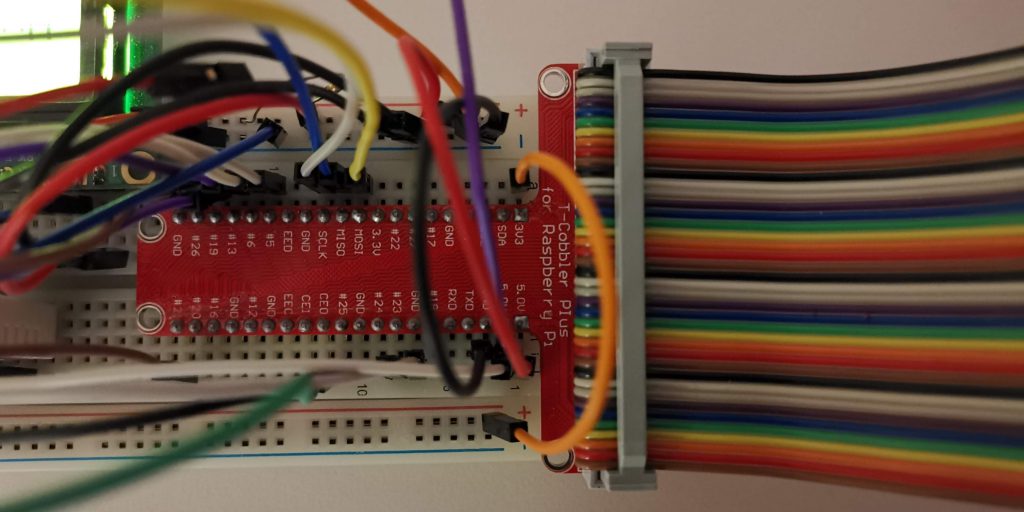
For prototyping, I’m using a solderless breadboard.
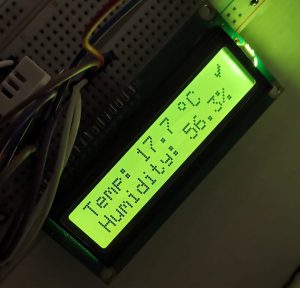
Optionally, you can connect an LCD. I use it for displaying the measured humidity and temperature and displaying the cloud IoT connectivity status.
I ordered my components in a local shop, but all of these components can be ordered from e.g. Banggood (just takes longer to receive them).
You will need a few additional components (resistors, potentiometer, cables), too, as shown in the next section.
Assembling the hardware
As the main focus of my post is on the cloud connectivity setup, let me just link to Circuito where you can see how to connect the components.
I found another helpful tutorial with assembly instructions at Electronics Hobbyist.
The software parts
Raspberry + DHT22
We need the following extra Python libraries on the Raspberry Pi:
Adafruit-CharLCD==1.1.1
Adafruit-DHT==1.4.0
RPi.GPIO==0.6.5
paho-mqtt==1.5.0
pyjwt==1.7.1
cryptography==2.8
The Adafruit libraries will be used for easily interacting with the sensor and the LCD.
The paho-mqtt library is needed to send telemetry data to GCP IoT via the MQTT protocol.
For the secure access we need some additional libraries like pyjwt and cryptography.
Install these requirements with pip (ideally in a Python virtual environment):
pip3 install -r requirements.txt
DHT 22 reading
The following code displays the readings from DHT22 sensor on the console.
import Adafruit_DHT as dht
from time import sleep


def main():
    try:
        while 1:
            humidity, temp = dht.read_retry(dht.DHT22, 23)
            print(f"Temperature={temp:0.1f}, humidity={humidity:0.1f}")
            sleep(10)

    except KeyboardInterrupt:
        pass


if __name__ == "__main__":
    main()
Let’s improve this code by displaying the measurements on the LCD.
There is a small extra feature presented in the following code; a custom degree symbol is created and displayed.
import Adafruit_DHT as dht
from Adafruit_CharLCD import Adafruit_CharLCD
from time import sleep


def create_lcd():
    lcd = Adafruit_CharLCD(rs=26, en=19, d4=13, d5=6, d6=5, d7=21, cols=16, lines=2)
    lcd.create_char(1, [0xc, 0x12, 0x12, 0xc, 0x0, 0x0, 0x0, 0x0])  # degree symbol
    lcd.blink(False)
    return lcd


def main():
    try:
        lcd = create_lcd()
        while 1:
            humidity, temp = dht.read_retry(dht.DHT22, 23)
            lcd.set_cursor(0, 0)
            lcd.message(f"Temp: {temp:0.1f} \x01C")
            lcd.set_cursor(0, 1)
            lcd.message(f"Humidity: {humidity:0.1f}%")
            print(f"LCD updated with temperature={temp:0.1f}, humidity={humidity:0.1f}")
            sleep(10)

    except KeyboardInterrupt:
        lcd.clear()


if __name__ == "__main__":
    main()
The last version of this code introduces GCP cloud IoT connectivity.
Highlights:
- The loop runs until keyboard interrupt
- Makes a temperature/humidity measurement every 15 mins
- Displays the temperature/humidity on the LCD
- Uses the dht22_iot_manager.py file to publish the measurement to GCP IoT
- Displays a status icon in the upper right corner based on the GCP IoT publish status
from dht22_iot_manager import IoTManager
import Adafruit_DHT as dht
from Adafruit_CharLCD import Adafruit_CharLCD
from time import sleep

READING_INTERVAL_SEC = 900  # 15 mins

IOT_STATUS_TO_LCD_SYMBOL = {"offline": "\x01", "online": "\x02", "connecting": "\x03"}


def create_lcd():
    lcd = Adafruit_CharLCD(rs=26, en=19, d4=13, d5=6, d6=5, d7=21, cols=16, lines=2)

    # CharLCD symbols designed at https://www.quinapalus.com/hd44780udg.html
    lcd.create_char(1, [0x0, 0x0, 0xa, 0x0, 0xe, 0x11, 0x0, 0x0])  # sad
    lcd.create_char(2, [0x0, 0x1, 0x3, 0x16, 0x1c, 0x8, 0x0, 0x0])  # checkmark
    lcd.create_char(3, [0x1f, 0x11, 0xa, 0x4, 0xa, 0x11, 0x1f, 0x0])  # hourglass
    lcd.create_char(4, [0xc, 0x12, 0x12, 0xc, 0x0, 0x0, 0x0, 0x0])  # degree symbol

    lcd.blink(False)

    return lcd


def lcd_show_iot_sync_status(lcd, status):
    """
    Display IoT sync status in the upper right corner of the LCD
    """
    if status in IOT_STATUS_TO_LCD_SYMBOL:
        lcd.set_cursor(15, 0)
        lcd.message(IOT_STATUS_TO_LCD_SYMBOL[status])


def main():
    try:
        iot = IoTManager()
        lcd = create_lcd()

        while 1:
            lcd.set_cursor(0, 0)
            humi, temp = dht.read_retry(dht.DHT22, 23)
            lcd.message(f"Temp: {temp:0.1f} \x04C")
            lcd.set_cursor(0, 1)
            lcd.message(f"Humidity: {humi:0.1f}%")
            # show hourglass on the LCD while sending data into the cloud
            lcd_show_iot_sync_status(lcd, "connecting")
            res = iot.publish_data(f"{temp:0.1f}", f"{humi:0.1f}")
            # show success or error symbol on the LCD
            lcd_show_iot_sync_status(lcd, "online" if res else "offline")
            sleep(READING_INTERVAL_SEC)

    except KeyboardInterrupt:
        pass

    # cleanup
    iot.disconnect()
    lcd.clear()


if __name__ == "__main__":
    main()
The next code holds the definition of the IoTManager class, that publishes over Google’s MQTT bridge.
This file uses Google’s root CA certificate that can be downloaded from the Google Trust Services Repository.
Please note, that the GCP IoT registry and device ID will be specified later, but I’ve hard coded their names into constants in this code already.
In order to connect to the device – to be added to the IoT registry later – securely, you need to generate an RSA X509 key pair for the Raspberry Pi. The following command can be used:
openssl req -x509 -newkey rsa:2048 -keyout dht22_private.pem -nodes -out dht22.pub
The private key file needs to be stored on the Raspberry Pi and its path needs to be set in the SSL_PRIV_KEY_PATH variable below.
import jwt
import time
from datetime import datetime, timedelta
import paho.mqtt.client as mqtt

SSL_PRIV_KEY_PATH = "[PATH_TO_YOUR_DEVICE_PEM_FILE]"
ROOT_CERT_PATH = "[PATH_TO_THE_GOOGLE_CA_ROOT_CERT]"
PROJECT_ID = "[YOUR_GCP_PROJECT_ID]"
GCP_LOCATION = "[YOUR_IOT_GCP_REGION]"
REGISTRY_ID = "pi_sensors"
DEVICE_ID = "dht22"

_CLIENT_ID = f"projects/{PROJECT_ID}/locations/{GCP_LOCATION}/registries/{REGISTRY_ID}/devices/{DEVICE_ID}"
_MQTT_TOPIC = f"/devices/{DEVICE_ID}/events"


class IoTManager:
    def __init__(self):
        self.connected = False
        self.client = mqtt.Client(client_id=_CLIENT_ID)
        self.client.on_connect = self.on_connect
        self.client.on_disconnect = self.on_disconnect
        self.client.on_publish = self.on_publish
        self.client.tls_set(ca_certs=ROOT_CERT_PATH)
        self.last_temp = -999
        self.last_humidity = -1
        self.exp = 0

    def create_jwt(self):
        now = datetime.utcnow()
        self.exp = now + timedelta(minutes=60)
        token = {
            'iat': now,
            'exp': self.exp,
            'aud': PROJECT_ID
        }
        with open(SSL_PRIV_KEY_PATH, 'r') as f:
            private_key = f.read()

        self.client.username_pw_set(
            username='unused',
            password=jwt.encode(token, private_key, "RS256")
        )

    def print_result(self, event, res) -> str:
        print(f"{event}: {mqtt.error_string(res) if isinstance(res, int) else res}")

    def on_connect(self, unusued_client, unused_userdata, unused_flags, rc):
        self.print_result("on_connect", rc)
        self.connected = True

    def on_disconnect(self, unusued_client, unused_userdata, unused_flags, rc):
        self.print_result("on_disconnect", rc)
        self.connected = False

    def on_publish(self, unused_client, unused_userdata, unused_mid):
        self.print_result("on_publish", None)

    def on_message(self, client, userdata, message):
        self.print_result("on_message", message)

    def connect(self):
        self.create_jwt()
        self.client.connect('mqtt.googleapis.com', 8883)
        self.client.loop_start()

    def disconnect(self):
        print("disconnecting IoT")
        self.client.disconnect()

    def publish_data(self, temp, humidity) -> bool:
        # skip publishing to IoT if temp/humidity didn't change since the last publish
        if self.last_temp == temp and self.last_humidity == humidity:
            return True
        self.last_temp = temp
        self.last_humidity = humidity
        if not self.connected or self.exp < datetime.utcnow():
            self.connect()
        payload = f"{{ 'ts': {int(time.time())}, 'temperature': {temp}, 'humidity': {humidity} }}"
        print(payload)
        try:
            rc = self.client.publish(_MQTT_TOPIC, payload, qos=1)
            rc.wait_for_publish()
            print("Published into GCP IoT")
            return True
        except ValueError as e:
            print(e)
        return False
The IoTManager creates a JWT token for secure connectivity on the first connection and uses it for 60 mins.
The code on the Raspberry can be run in the background using the following command in the Python virtual environment:
nohup python3 dht22_to_iot.py &
Google Cloud setup
Note: it is recommended to create all GCP resources in the same region.
Cloud costs: $0
The following table summarizes the estimated service usages and the free usage limits available during and after the free trial period.
Resource type | Usage | Free usage limit |
IoT Core / Device | ~3000 events in a calendar month | 250 MB / Calendar month free |
Cloud Pub/Sub | ~3000 ingestion / ~3000 deliveries in a calendar month | First 10 GB of usage is free. It includes message pulls, too. |
Cloud Scheduler | 1 scheduler job | 3 jobs per month are free. |
Cloud Function | ~3000 invocations in a month | The first 2 million invocations in a month are free. Free outbound data to Google APIs. 400,000 GB-seconds, 200,000 GHz-seconds of compute time and 5GB of Internet egress traffic per month are free. |
BigQuery | Ingesting ~3000 rows per month. | Data ingestion is free. |
Pub/Sub Topic
Create a Pub/Sub topic that will be used for storing the collected data from the sensors.

The role of this topic is to decouple the solution elements and let other components consume and process the captured device data in various ways. For example, real-time ingestion of device data into BigQuery or other databases is possible by subscribing a cloud function on the Pub/Sub topic. GCP provides a default Pub/Sub-to-BigQuery ingestion template with Google Cloud Dataflow (which is based on Apache Beam). This subscription can be created on the GCP Console and a basic setup doesn’t require any coding.
In our case we will use the GCP resources sparingly and implement batch processing of the Pub/Sub messages with a scheduled cloud function rather than letting Google invoke the function on every message.
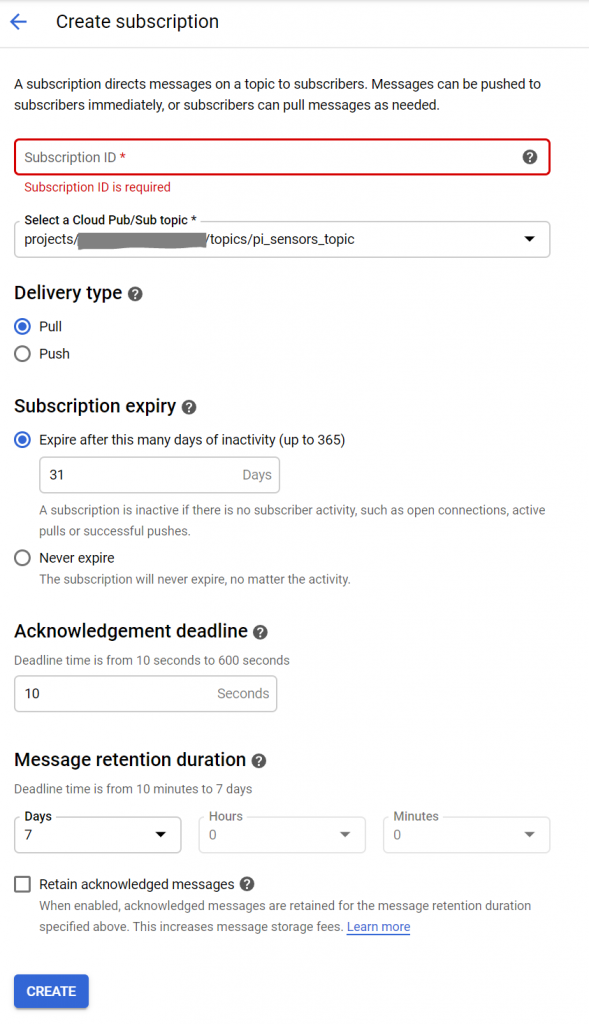
Pub/Sub subscription
In our case a pull subscription is needed so that we can consume the messages in batches in regular intervals.
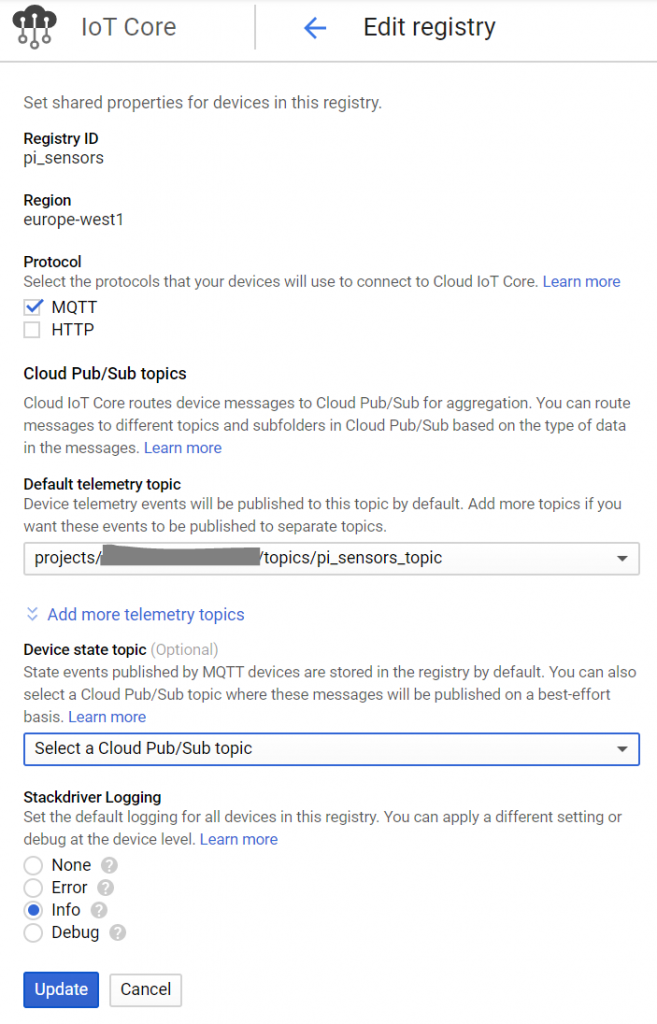
IoT registry
To manage IoT devices in the cloud, an IoT registry needs to be created in your project in a preferred region.
A registry is a container of devices that share some properties.
The protocol we are going to use to connect to IoT Core is MQTT.
MQTT is a lightweight machine-to-machine protocol which is a good for communicating IoT sensor data. See more at http://mqtt.org/
The telemetry topic needs to be set to the Pub/Sub topic created previously.
IoT Device
In order to connect the device securely, we generated an RSA X509 key pair for the Raspberry Pi earlier.
Locate the public key file (dht22.pub), copy its contents and use it in the next step where a device will be created inside the previously created IoT registry.
Go to the GCP IoT Core, open the registry created earlier and add a new device. Paste the public key file’s contents into the Public key value field.
![]()
BigQuery dataset
Create a BigQuery dataset in your preferred location.
Then create a table and add the following fields:
- device_id
- timestamp
- temperature
- humidity
This schema support multiple devices and has a timestamp field that will be useful for making analysis on the collected data, drawing linecharts, etc.
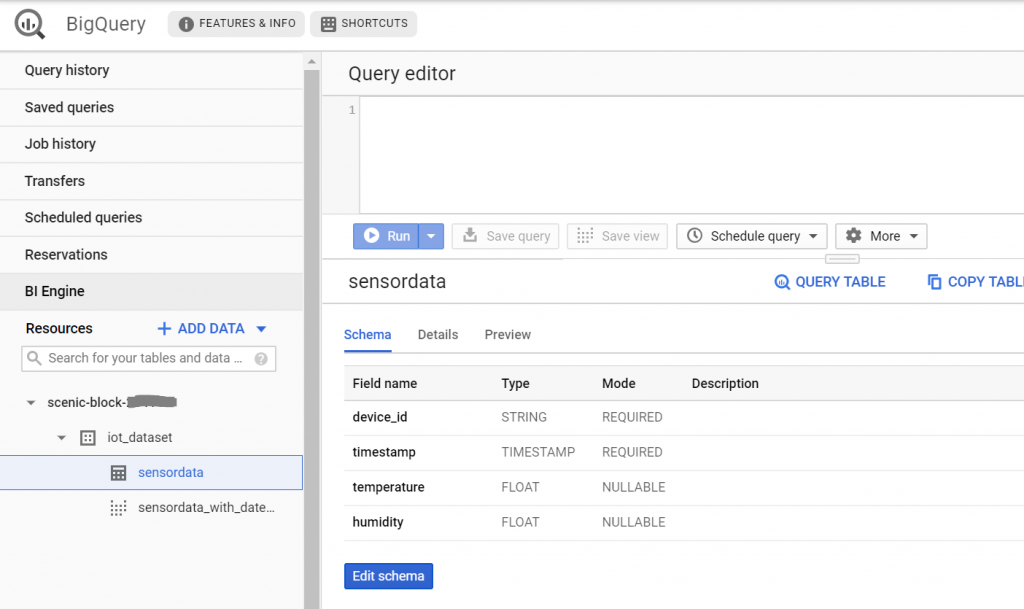
Remember the dataset ID and the table name.
Ingesting data from Pub/Sub into BigQuery
There are several options available.
1. Using the Google-provided DataFlow streaming templates
If you are looking for a quick solution, you can use the Google-provided DataFlow templates that import data from Pub/Sub Topic/Subscription to BigQuery.
I am not aware of an always-free limit for the Cloud DataFlow service, so please consult the pricing page before using this option.
2. Cloud function with Pub/Sub trigger
When deploying a Cloud function, you can select the Pub/Sub trigger type and point to a Pub/Sub topic. Your function will be invoked when a message lands in the Pub/Sub topic.
This option is suitable for solutions with near-real time data processing requirements.
I didn’t choose this option for my solution because I wanted to control when and how frequently my function will be called.
3. Scheduled Cloud function consuming Pub/Sub with a pull subscription
In this case we deploy a cloud function with a HTTP trigger and setup a Cloud Scheduler job that will invoke the function on regular intervals. The function will (batch) process all messages that were published into the Pub/Sub topic since the last invocation.
Next we are going to develop a Cloud function for option 3.
The Cloud function
The function pulls and acknowledges messages from the Pub/Sub topic and imports them into the BigQuery table.
On the GCP Cloud Functions console, create a new cloud function with HTTP trigger.
We will store several settings in environment variables to make the function reusable.
flask==1.1.1
google-cloud-pubsub==1.1.0
google-cloud-bigquery==1.23.0
Flask is a HTTP framework and we use it only for generating a response from the cloud function.
The other two dependencies are needed for using the Pub/Sub and BigQuery APIs with the Google Cloud Python libraries.
For local testing, these requirements need to be installed with pip (ideally in a Python virtual environment):
pip3 install -r requirements.txt
The cloud function’s code:
import json
import logging
import os
from flask import abort
from google.cloud import pubsub_v1
from google.cloud import bigquery


def bigquery_import(messages: list):
    client = bigquery.Client()
    rows_to_insert = []
    table = client.get_table(f"{os.environ.get('GCP_PROJECT')}.{os.environ.get('BQ_DATASET')}.{os.environ.get('BQ_TABLE')}")
    for msg in messages:
        rows_to_insert.append((msg.get("device_id"), msg.get("ts"), msg.get("temperature"), msg.get("humidity")))

    errors = client.insert_rows(table, rows_to_insert)
    if errors == []:
        logging.info("New rows have been added.")
    else:
        logging.error(errors)


def pull_sensor_data(batch_size):
    project_id = os.environ.get("GCP_PROJECT")
    subscriber = pubsub_v1.SubscriberClient()
    subscription_path = subscriber.subscription_path(project_id, os.environ.get("SENSORS_PUBSUB_SUBSCRIPTION"))

    num_imports = 0
    while 1:
        response = subscriber.pull(subscription_path, max_messages=batch_size, return_immediately=True)
        if len(response.received_messages) == 0:
            break

        messages = []
        ack_ids = []
        for received_message in response.received_messages:
            iot_data = json.loads(
                (received_message.message.data).decode().replace("'", "\""))
            iot_data["device_id"] = received_message.message.attributes["deviceId"]
            logging.info(f"Received: {iot_data}")
            messages.append(iot_data)
            ack_ids.append(received_message.ack_id)

            subscriber.acknowledge(subscription_path, ack_ids)

        logging.info(
            f"Received and acknowledged {len(messages)} messages.")

        num_imports += len(messages)
        bigquery_import(messages)

    return num_imports


def request_handler(request):
    if not all(env_var in os.environ for env_var in ["GCP_PROJECT", "SENSORS_PUBSUB_SUBSCRIPTION", "BQ_DATASET", "BQ_TABLE"]):
        logging.error("Environment variables are incomplete! Aborting...")
        return abort(500)
    request_json = request.get_json()  # json is only available if the request's mime type was set to json
    if not request_json:
        request_json = json.loads(request.data)
    if request_json and "batchSize" in request_json:
        num_messages = pull_sensor_data(int(request_json["batchSize"]))
        return f"{num_messages} messaged imported into BigQuery"

    return abort(422)  # unprocessable entity


# for local testing from console, update the environment variables below
# and set the GOOGLE_APPLICATION_CREDENTIALS environment variable to
# the path of your service account info JSON file
if __name__ == "__main__":
    logging.basicConfig(format="%(levelname)s:%(message)s", level=logging.DEBUG)
    os.environ["GOOGLE_APPLICATION_CREDENTIALS"] = "[PATH_TO_YOUR_SERVICE_KEY_JSON_FILE]"
    os.environ["GCP_PROJECT"] = "[YOUR_PROJECT_ID]"
    os.environ["SENSORS_PUBSUB_SUBSCRIPTION"] = "[YOUR_PUBSUB_TOPIC_NAME]"
    os.environ["BQ_DATASET"] = "[YOUR_IOT_BIGQUERY_DATASET_NAME]"
    os.environ["BQ_TABLE"] = "[YOUR_BIGQUERY_TABLE_NAME_WITHIN_THE_DATASET]"

    num_messages = pull_sensor_data(10)
    logging.info(f"Pulled and imported {num_messages} messages")
The function keeps pulling messages in batches of pre-defined size while there are messages available. The pulled messages are uploaded into BigQuery in each iteration.
The batch size parameter (batchSize) has to be specified in the request payload.
The function can be tested through its main() function on the console after setting up a service account in the local environment. To use this code with a service account, the following permissions are necessary:
- BigQuery Data Owner
- Pub/Sub Subscriber
To deploy the function to GCP, make a ZIP archive that contains the requirements file and the python code and upload the ZIP into the function. Also set the following environment variables for the Cloud function:
- SENSORS_PUBSUB_SUBSCRIPTION
- BQ_DATASET
- BQ_TABLE
The variables for the project name and application and credentials don’t need to be set if you are running this function in the same project as the other solution elements and the function’s service account has the necessary permissions.
The only thing left is to schedule the function to run every hour.
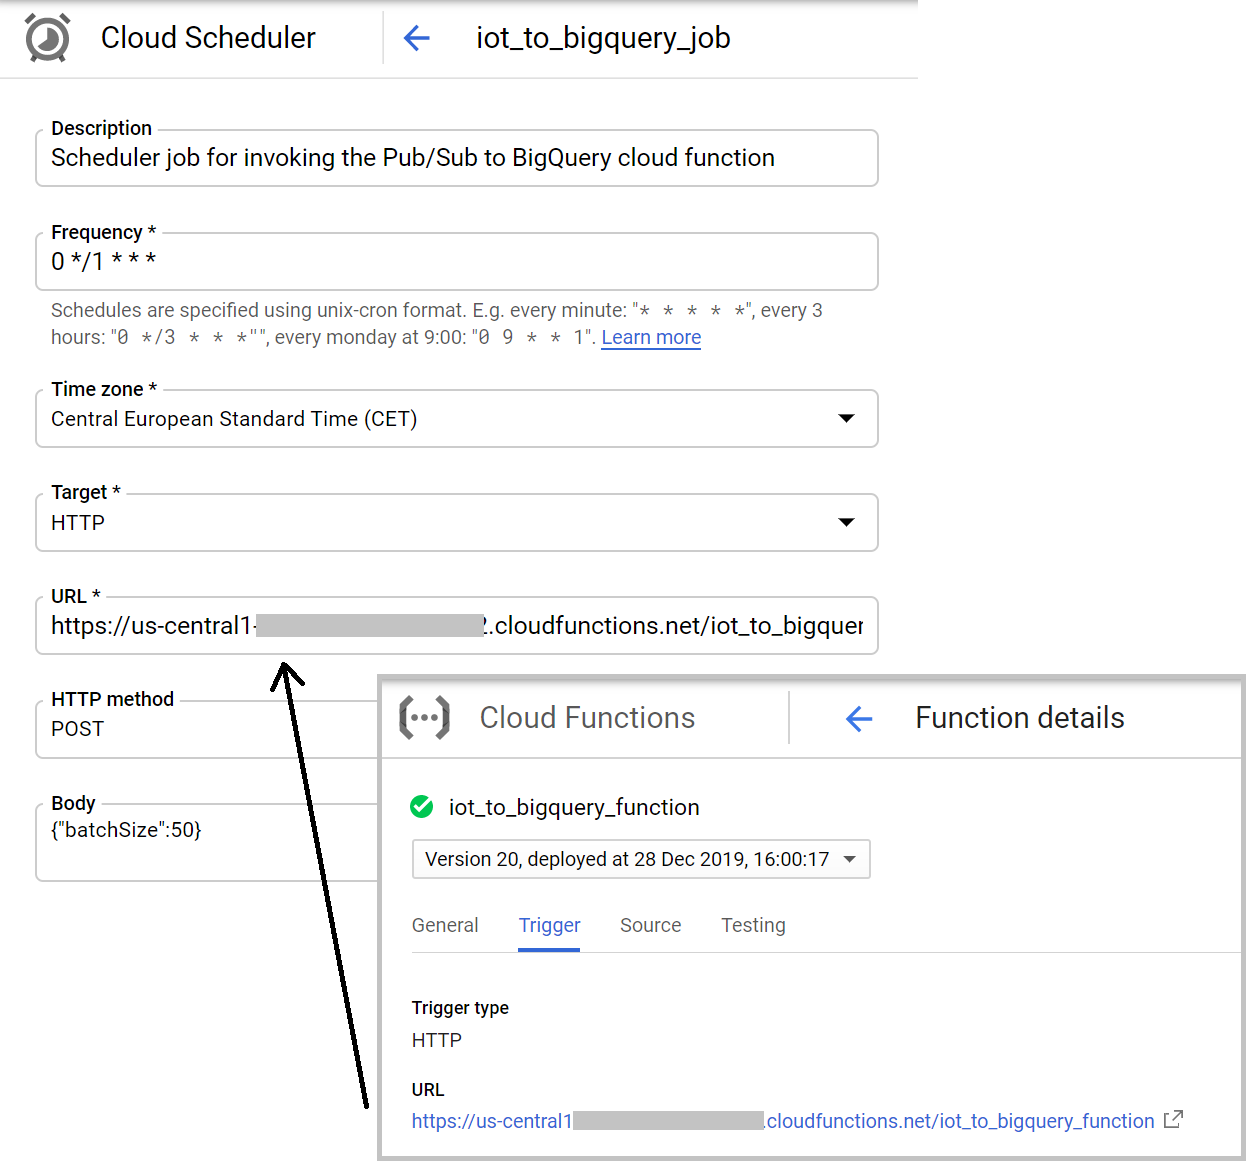
Cloud Scheduler
The Cloud Scheduler appears in the main GCP navigation as a standalone GCP service, but it seems to be tied to the App Engine. By enabling the Cloud Scheduler in the project, an App Engine application is created automatically. We won’t use the App Engine in this solution, but the Cloud Scheduler requires a default App Engine project to exist.
Create a scheduler job that sends a POST request with JSON payload below to the function’s trigger endpoint.
Visualizing the sensor data
If you want to display the temperature/humidity data from the BigQuery table without having to build a frontend, you can use Data Studio.
Below you can see a chart for humidity vs. temperature displaying hourly averages.
There is native integration between BigQuery and Data Studio, so building this chart doesn’t require any coding.
